
Step 1: Go to the downloads directory of your system (default one) or to the location where you have saved the VM image.
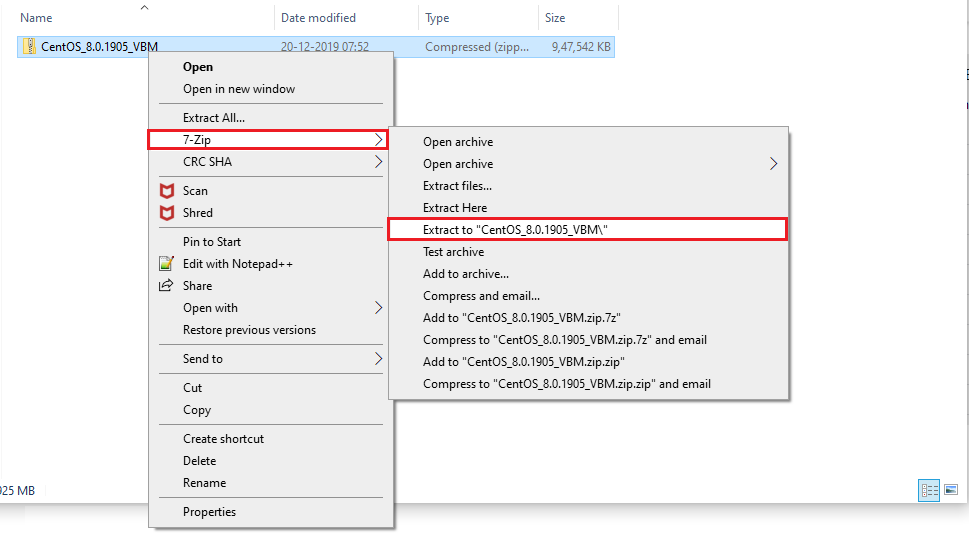
Step 2: Extract the VM zip file using WinZip or 7-Zip program.
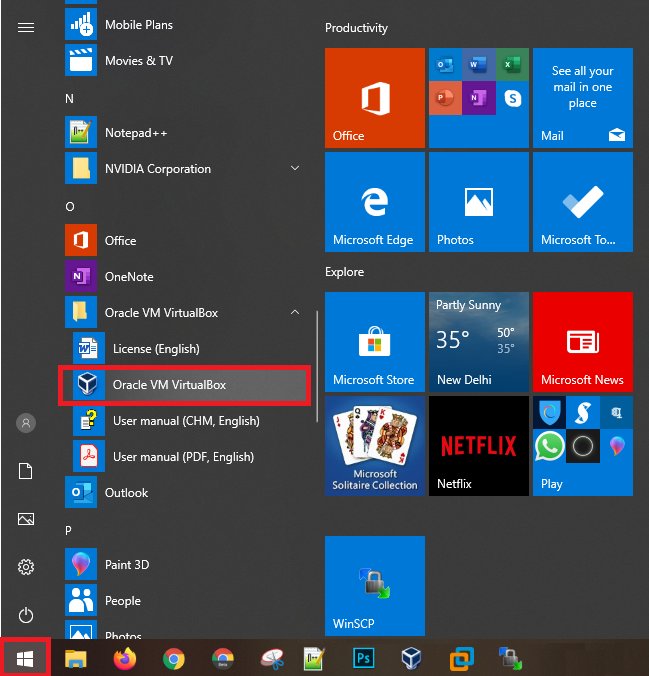
Step 3: Open the VirtualBox.
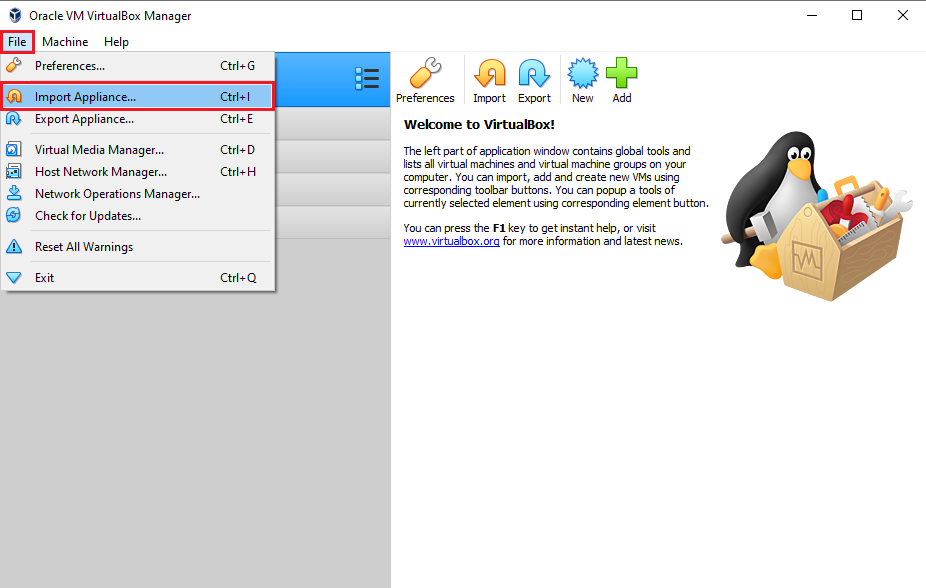
Step 4: Go to file » Import Appliance.
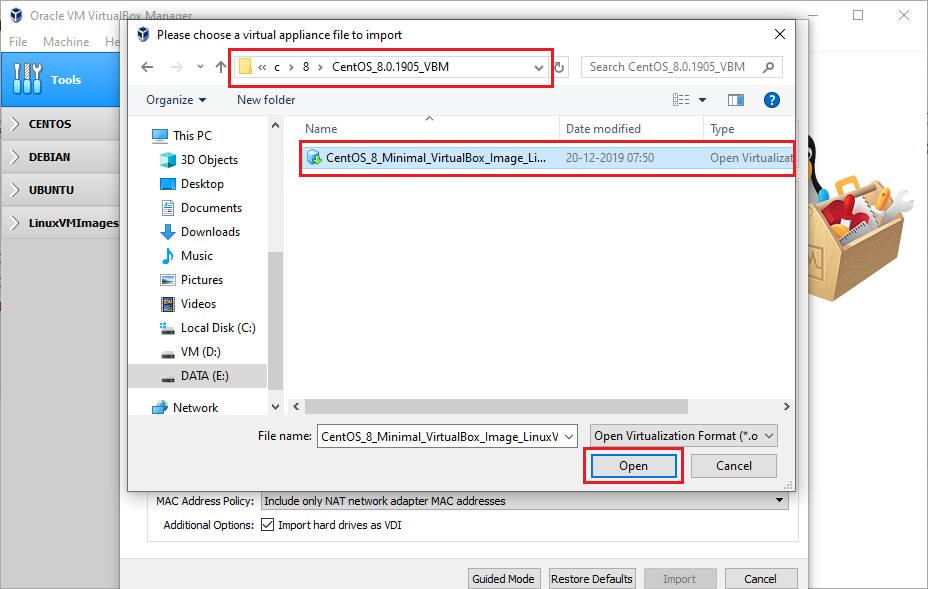
Step 5: On the Import Virtual Appliance wizard, click the browse icon button to choose a VM file to import.

Step 6: Browse to the location where you have extracted the VM image. and then select the image and then click on Open.
Step 7: Change the name of the VM and other values if required.
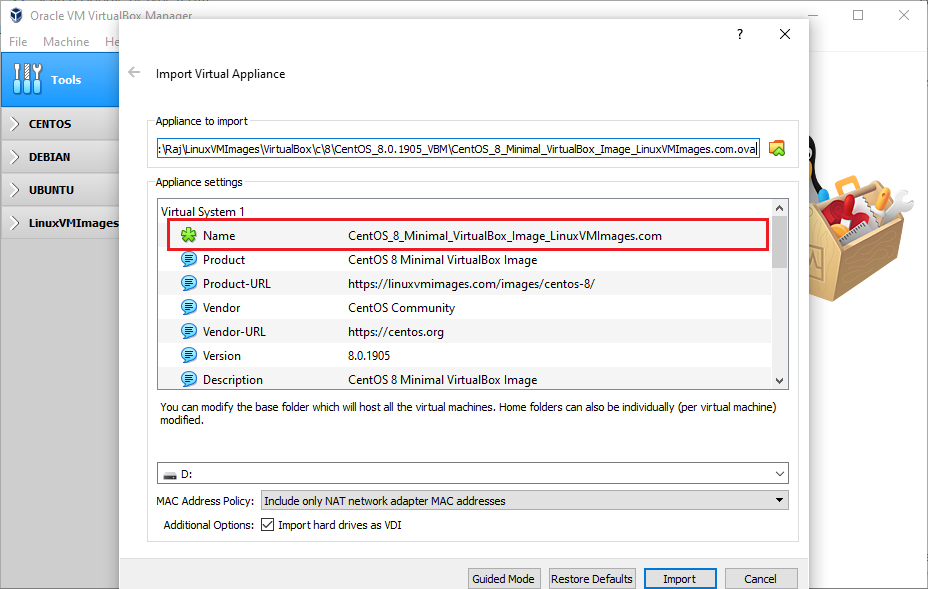
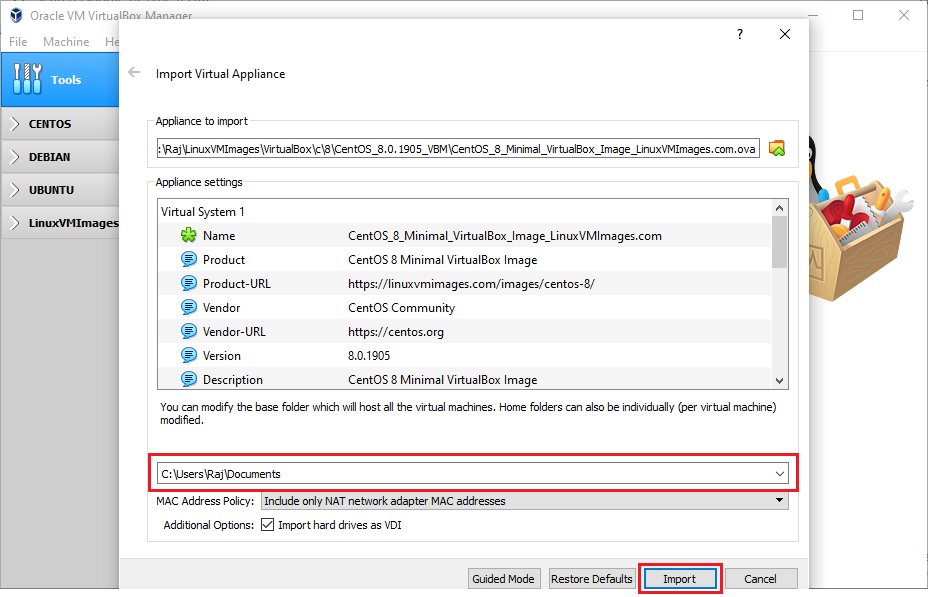
Step 8: Choose the hard disk location where you want the Virtual Machine(disks and configurations) to be saved and run and then click the Import button.
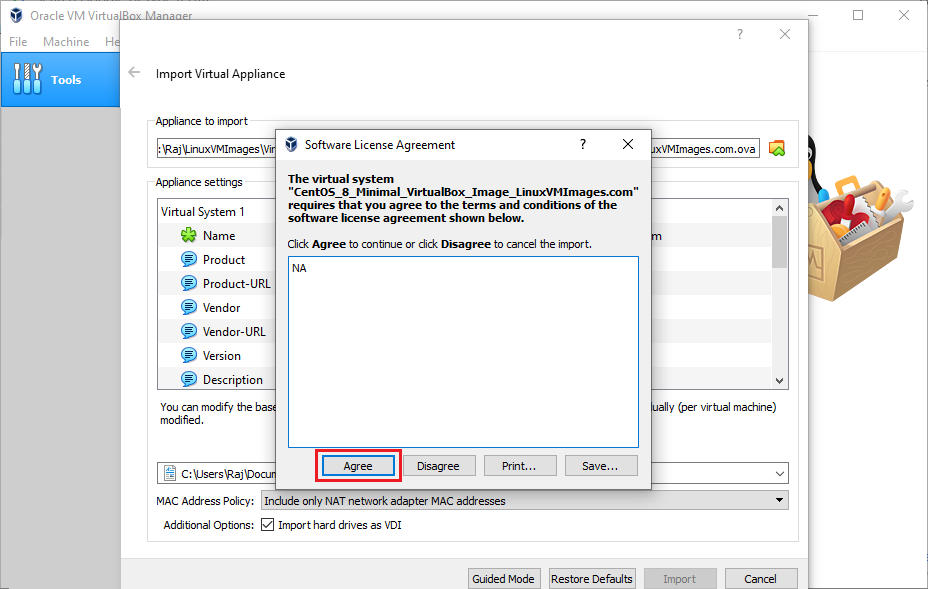
Step 9: Agree to Software License Agreement.
Step 10: VirtualBox will now start importing the VM image. Wait for the import to complete.

Step 11: Once the import is complete, you should see a new Virtual Machine in the VirtualBox.

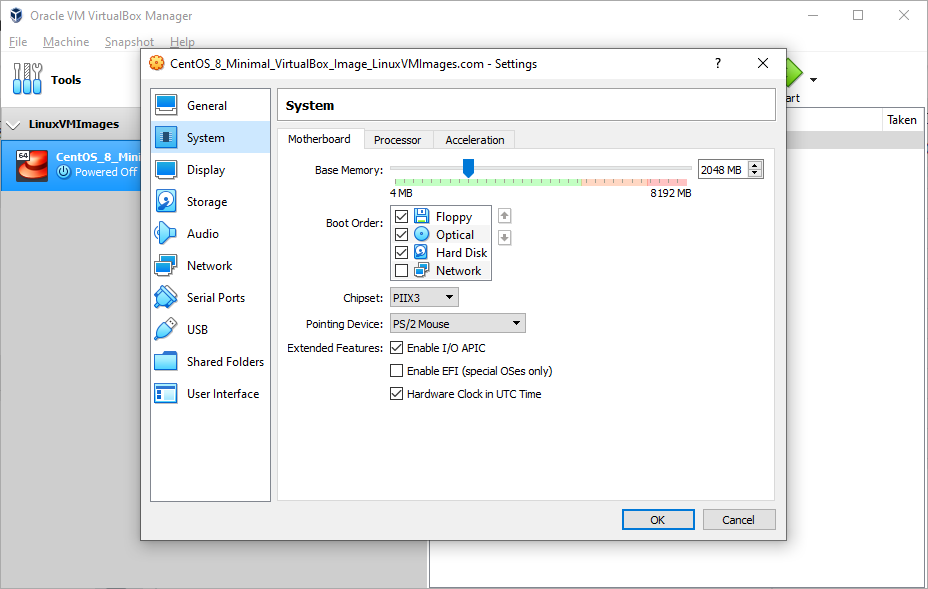
Step 12: If required, you can change the virtual machine’s resources like CPU, Memory, Network, and other settings by right-clicking on the virtual machine.
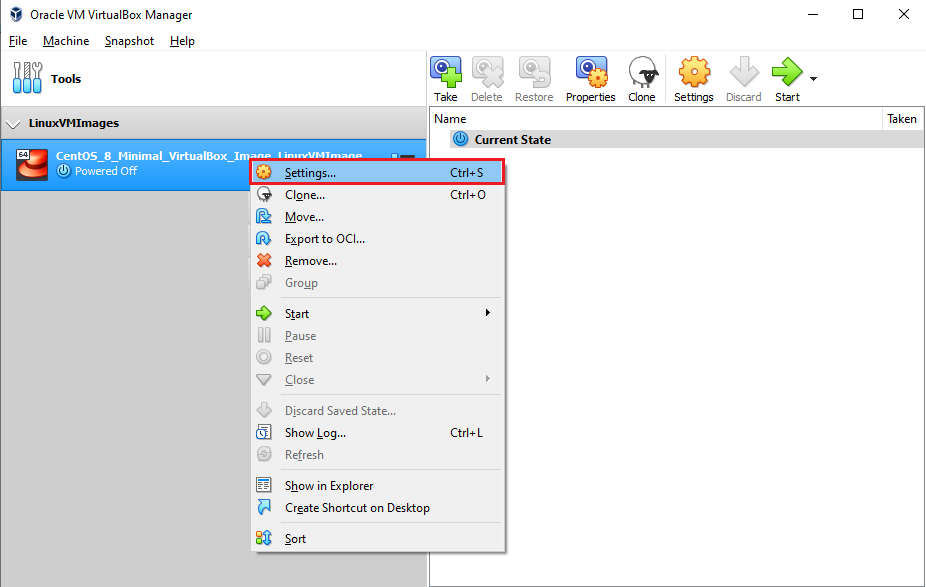
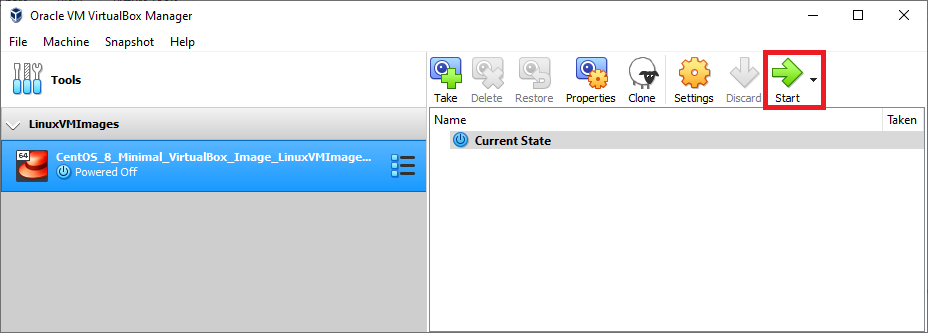
Step 13: You can now power on the virtual machine to start working on it.
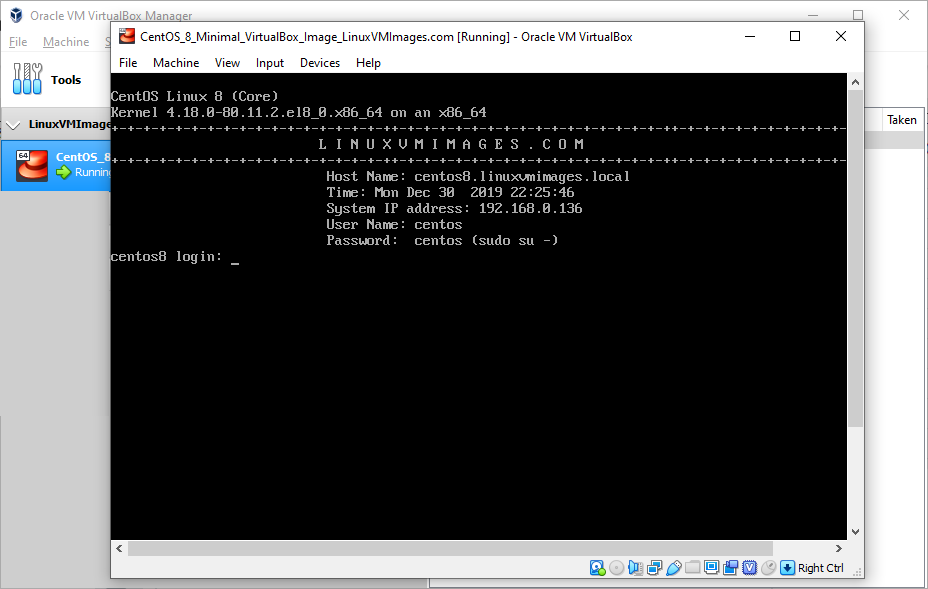
Virtual Machine Running On VirtualBox
Please share your feedback in the contact us / comments section.